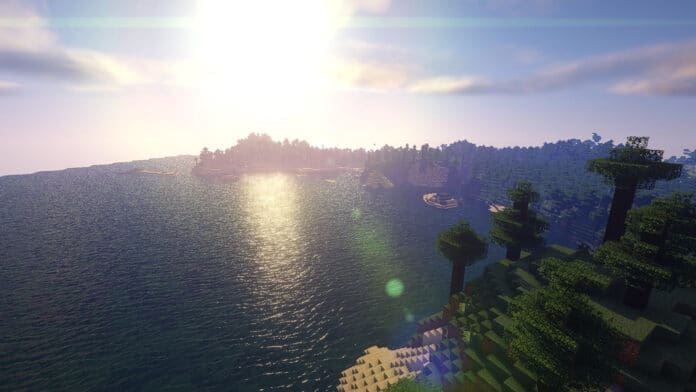
Ever wondered why the Minecraft videos of your favourite YouTuber looks so much better and more cinematic than the version you are playing on? Do you want your game to look more lifelike and cinematic without drastically changing textures and many settings? Well fret not as today we will be talking about some of the best Minecraft Shaders that will boost the colours and saturation of your game.
Shaders or better known as Shader Packs are types of graphic mods that completely overhaul the looks of the Minecraft world by adding gorgeous lighting, realistic shadows, beautiful skyboxes and oceans, swaying grass and leaves, and much more. While the shader packs are very powerful tools, they also come with a drawback, of course, that is it takes more toll on your machine. Some shader packs are far more resource-intensive than others, and some run with almost minimal performance hit. In the list below we’ve talked about the top 3 shader packs in our opinion and their performance hit on the system.
Before we begin, the list is based on our personal preference and it doesn’t mean that there aren’t options better than those mentioned below.
1. Sildur’s Vibrant Shaders
Sildur’s Vibrant shaders completely revamp the lighting system of Minecraft and add advanced effects like volumetric lighting, bloom, ambient occlusion and reflections. Sildur’s shaders are extremely comprehensive and provide a much-needed makeover to the base game. It adds a bunch of options to the game and is extremely customizable allowing users to maintain high performance even on old systems.
Sildur’s Vibrant Shaders are the go-to mod for most players and you will find many players recommending this pack over other mods.
Sildur has provided six different configs of the mod to try out, from Lite through to Extreme, choose any config depending on your system configuration. Even at maximum settings this shader pack is remarkably lightweight and is extremely performant compared to most Minecraft shader mods.
2. Sonic Ether’s Unbelievable Shaders
SEUS is a great beginner-friendly graphic mod that doesn’t need you to be extremely well versed with knowledge about graphics options and their effect. SEUS is a complete package that you just need to drop in your game and you get a superb looking Minecraft game with minimal performance lost.
While SEUS offers limited customization options than most shader mods, it is extremely good looking right out of the gate and requires almost no tweaking making it extremely beginner-friendly.
3. Vanilla Plus Shaders
Vanilla Plus expands on the base game options while being extremely true to the base game graphics. This shader pack aims to offer a high-quality and elegant graphics makeover while staying true to the vanilla looks of the game.
You won’t be seeing many custom textures or color profiles, but the game will look extremely vibrant and complete. Vanilla Plus adds support for dynamic shadows, volumetric clouds, lens flare, god rays, bloom, and much more. This pack have an almost negligible performance hit while staying true to the game dev’s vision.
How to install Shader Packs in Minecraft?
Install using Optifine:
1. Download and install Minecraft, setup your game profile of the version you want to run.
2. Download and run the optifine jar file with Java. It will install a new optifine profile.
3. Run the Minecraft launcher and select the newly created optifine profile.
4. Start the game.
5. Go to options -> video settings -> shaders and press on the “Shaders folders” button at the bottom of the screen.
6. Download shaderpacks and place them in the newly opened window.
7. Select any shaderpack from the list ingame and enjoy your new visuals!
Install using Iris:
1. Download and install Minecraft, setup your game profile of the version you want to run.
2. Download and run the Iris jar file with Java.
3. In the installer, select “Iris and Sodium” pick your Minecraft version and uncheck “install as fabric mod” then hit install.
4. Run the Minecraft launcher and select the newly created profile. (Create a new profile if it didn’t create one)
5. Start the game.
6. Go to options -> video settings -> “Shader Packs” and press on the “Open Shader Pack folder” button.
7. Download shaderpacks and place them in the newly opened window.
8. Select any shaderpack from the list ingame and enjoy your new visuals!
Note: Iris+Sodium can also be installed as a fabric mod.
Fabulous shaders using Mojang’s inbuild shaders support supported from Minecraft version 1.16.5
1. Download the resourcepack and move it into your resourcepack folder.
2. Launch Minecraft and select the resourcepack from the list.
3. Go to video settings – options and set graphics to fabulous.
4. That’s it!


