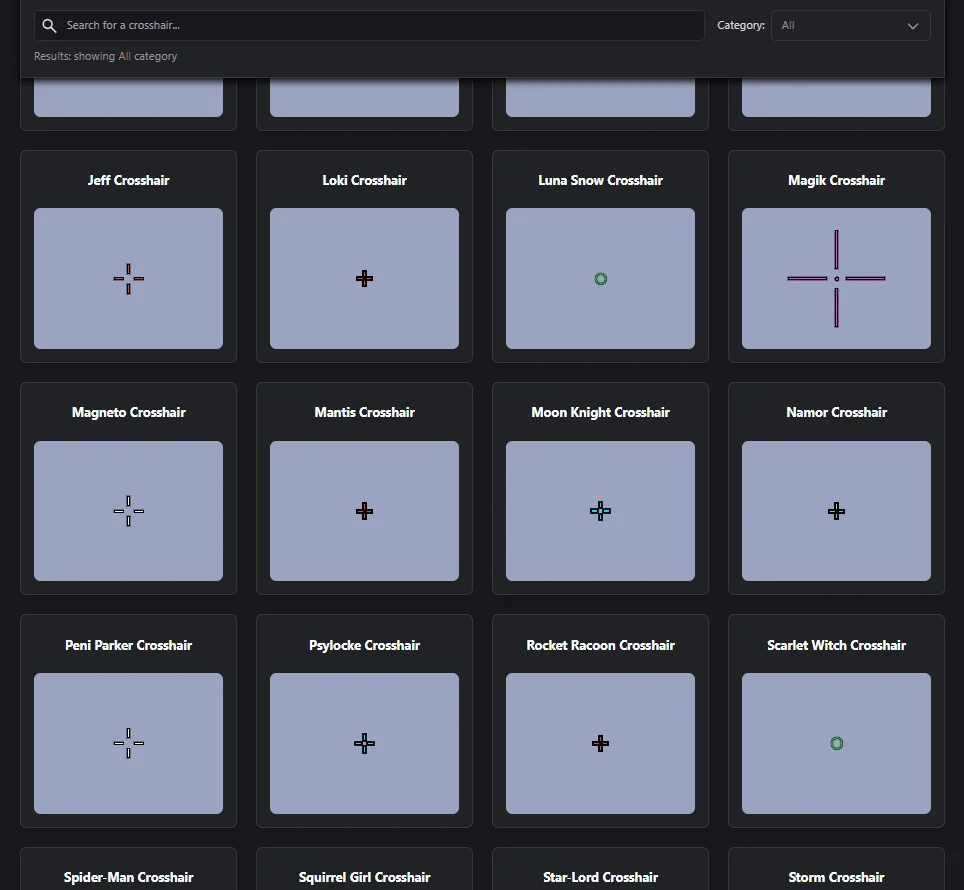
As with any competitive hero shooter, learning how to change your crosshair is essential if you’re looking to improve your gameplay in Marvel Rivals.
While the default crosshair might seem adequate to newbies at first glance, the more you play the game, the more you’ll realize the importance of having a custom crosshair.
When it comes to crosshairs in Marvel Rivals, there is no one-size-fits-all solution. You’ll need to tailor your crosshair to match your playstyle and preferred role.
Fortunately, NetEase offers a wide range of customization options to help you fine-tune your crosshair in Marvel Rivals.
Without further ado, let’s take a look at how to change crosshair in Marvel Rivals.
How To Change Marvel Rivals Crosshair
The process of changing your crosshair in Marvel Rivals varies slightly depending on whether you’re playing on PC or console.

PC
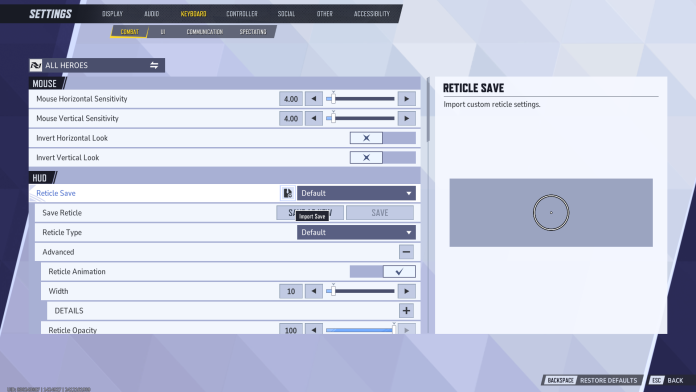
To change your crosshair in Marvel Rivals on PC, simply follow these steps:
- Launch Marvel Rivals.
- Go to ‘Settings’.
- Under the ‘Keyboard’ tab, go to the ‘Combat’ settings.
- Scroll down to the HUD section.
- Customise your Reticle as per your liking (you can go to the ‘Advanced’ tab for more options).
Once you have customized your crosshair as per your liking, hit ‘Save as New’ and assign a name to it.
Console
If you’re on console or using a controller on PC, follow these steps to change your crosshair:
- Go to ‘Settings’.
- Head to the ‘Controller’ tab.
- Scroll down the ‘Combat’ tab till you see the HUD section.
- Customize your reticle and save.
Note that you can only have up to five crosshairs saved at a time in Marvel Rivals. Once you have filled up your save slots, you’ll have to delete one crosshair before you can add another to your account.


